Introduction
Installing an Ethernet adapter card in your desktop PC is a straightforward task that can greatly enhance your network connectivity. Whether you are upgrading your system or replacing a faulty adapter, this guide will walk you through every step of the process. By following our detailed instructions, you can ensure a smooth installation and a significant boost to your networking capabilities.
Required Tools and Materials
- Ethernet adapter card
- Phillips-head screwdriver
- Anti-static wrist strap
- Desktop PC
- Ethernet cable
Step-by-Step Installation Process
Step 1: Prepare Your Workspace
Before getting started, make sure you have a clean and clutter-free workspace. This will help you avoid losing any small screws or damaging components.
Step 2: Power Down and Unplug
- Turn off your computer and unplug all cables, including the power cord, to prevent any electrical hazards.
- Press the power button for a few seconds to discharge any remaining electricity in the system.
Step 3: Open the Computer Case
- Using the Phillips-head screwdriver, remove the screws that secure the side panel of your computer case.
- Slide off the side panel and place it aside.
Step 4: Ground Yourself
- To avoid damaging delicate components with static electricity, put on an anti-static wrist strap and attach it to a metal part of the case.
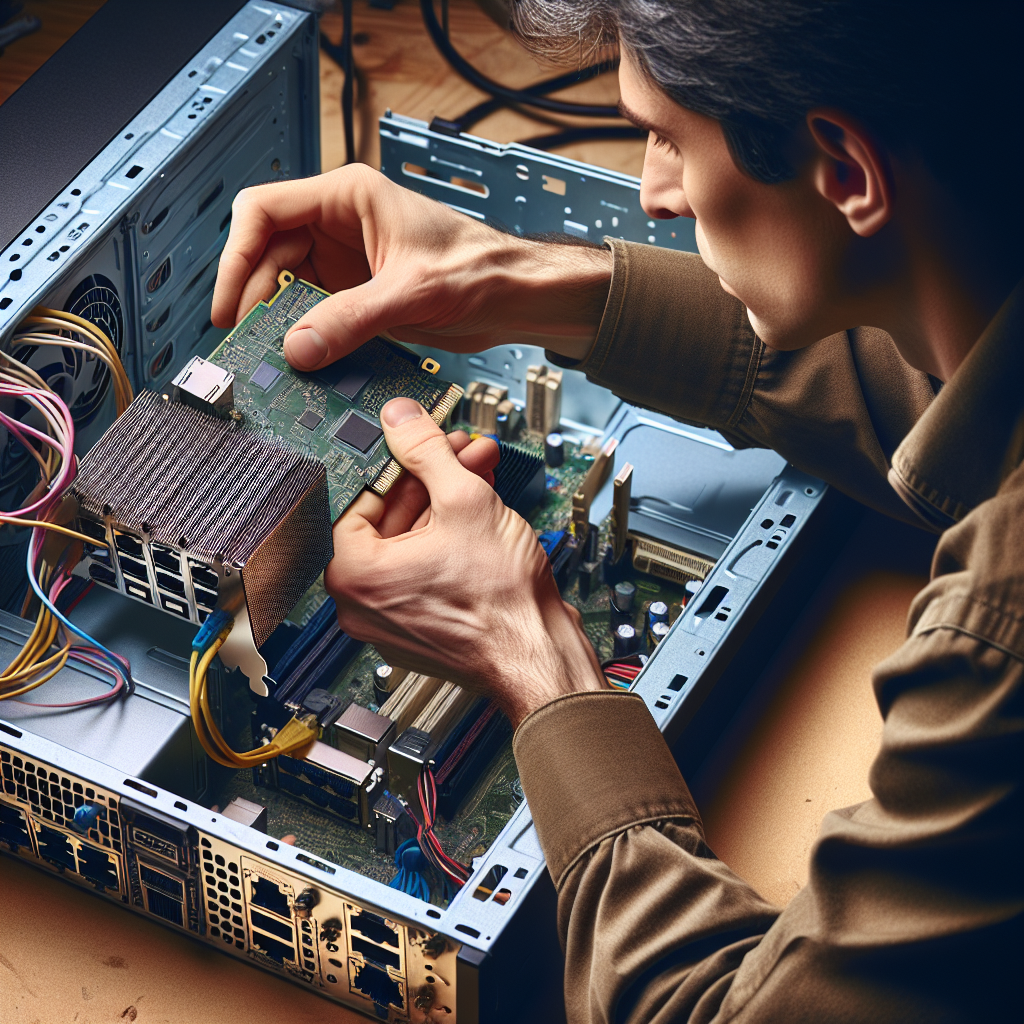
Step 5: Identify an Available PCIe Slot
- Locate an available PCIe (Peripheral Component Interconnect Express) slot on your motherboard. PCIe slots are usually white or light-colored and differ in size depending on their type (x1, x4, x8, or x16).
Step 6: Remove the Slot Cover
- If there is a metal or plastic cover over the slot you will be using, remove it by unscrewing it or snapping it out.
Step 7: Insert the Ethernet Adapter Card
- Gently press the Ethernet adapter card into the PCIe slot. Ensure that it is aligned correctly and fully seated.
- Secure the card by fastening the screw that you removed when taking off the slot cover.
Step 8: Close the Computer Case
- Replace the side panel of your computer case and screw it back into place.
Step 9: Reconnect Cables and Power On
- Plug all cables back into your computer, including the power cord.
- Turn on your computer and wait for the operating system to boot up.
Step 10: Install Drivers
- Depending on your operating system, you may need to install drivers for the new Ethernet adapter card. Check the manufacturer’s website for the latest drivers and follow their installation instructions.
- Alternatively, your operating system might automatically detect and install the necessary drivers.
Troubleshooting Tips
If you encounter any problems during the installation process, here are some common issues and their solutions:
- Computer Does Not Recognize the Ethernet Card: Ensure that the card is properly seated in the PCIe slot and that any required power connectors are attached.
- No Network Connection: Check that the Ethernet cable is firmly connected to both the adapter card and the network device (e.g., router or switch).
- Driver Issues: Verify that you have installed the correct and most recent drivers for your operating system.
- Static Discharge: Always use an anti-static wrist strap and handle components by their edges to minimize the risk of static discharge.
Conclusion
By following these steps, you can successfully install an Ethernet adapter card in your desktop PC and enjoy improved network connectivity. This DIY project is relatively simple and can usually be completed within an hour, even by those with minimal technical experience. Remember to take your time, follow safety precautions, and consult your motherboard’s manual if you encounter any uncertainties. With your new Ethernet adapter card, you will experience faster and more reliable internet connections, making it a worthwhile upgrade for any desktop PC.